Thanks to everybody who are reading my blog worldwide and eventually found my post about the Foam Gun on Kaercher HD machines. I really appreciate your visit and thanks to a buddy who sent me an e-mail asking me for some directions on making the modification on the "Foam Gun" nozzle, I made this post in english so it'll be easier to help even more people, once Google translator fails to translate precisely the brazilian portuguese to english or any other language. And I'm really happy to make this translation.
Actually I won't translate the whole post as is, but the essence will be the same.
Be aware that this modification is NOT Kaercher approved and you should do it on your own risk. It voids the warranty of the accessory, but worked perfectly fine to me.
Be aware that this modification is NOT Kaercher approved and you should do it on your own risk. It voids the warranty of the accessory, but worked perfectly fine to me.
At least, here in Brazil, we have two different specifications for the HD 585: the 110V and 220V wich have a slight difference on the pressure. 1550psi for 110V model and 1600psi for the 220V model.

The theory:
On the MTM Hydro website I found that the Foam Gun operates with 2320psi, and I found on some auto detailing foruns that the nozzle hole diameter needs to be broader to avoid the machine safety pressure valve activation. http://www.mtmhydro.it/it/prodotti/lancia-schiuma-professionale
So at first I thought it was a Venturi tube design that delivers the soapy solution to the chamber and mixed with the pressurised water. Then, when I disassembled the body I realised it was an orifice plate design. The equations I could find on wikipedia, and some information like water flow were in the machine owner manual (500L/h). https://en.wikipedia.org/wiki/Orifice_plate
Disassembling:


The Nozzle:
Well, I was not sure if my calculations were accurate, so I started drilling the hole with a 1.4mm and still had trouble with the safety valve from the machine. But this time the opening of the valve took longer to bypass the overpressure. So I knew I was in the right direction.

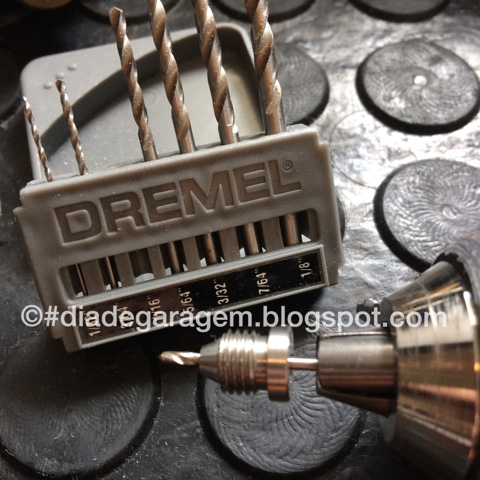
So, the next step was the 1.5mm, slightly bigger than the 1.48mm that my calculations were telling me, but I don't think I could find a drill so milimetrical precise. So 1.5mm it is and in fact worked really well.
Assembling and test:
To assemble the Foam Gun, just follow the reverse steps. First screw the nozzle back to the body, then the HD interface adapter an finally the valve handle
It is also important to remember that you need to use a shampoo designed for the technique. Well, here in Brazil some wonderful products like "Meguiar's Class Gold" and "Chemical Guys Mr. Pink" or "Honey dew" are ridiculously expensive, but it really worth.
Once the nozzle hole is bigger, the pressure is lower (1600psi against original 2320psi) so the vacuum to suck the soapy solution from the reservoir is lower. To solve this issue I use 500ml (about 16oz.) with 60ml (2oz.) of shampoo. It means use a higher concentrated soapy solution and is enough to cover a compact sedan, like a Toyota Corolla. For a Pick up truck like a Chevrolet Colorado, about 750ml (24oz.) with 90ml (3oz) of shampoo will do the trick.


Thanks for reading, and I'll be very glad to translate any other article in this blog to help you and your car. Hope it works perfectly fine for you and I see you on the next translation on "Dia de Garagem" (Garage day)!